ClamAV Antivirus Server Rev 5
ClamAV is an open source (GPL) anti-virus engine used in a variety of situations including email scanning, web scanning, and end point security. It provides a number of utilities including a flexible and scalable multi-threaded daemon, a command line scanner and an advanced tool for automatic database updates.
ClamAV website Source code Offical docs
Setup and configuration have been tested on following OS with version:
- Ubuntu- 18.04, 20.04, 22.04 (Jammy Jellyfish), Debian 11 (bullseye), Rocky 8 (Green Obsidian), Windows 10, Windows Server 2019
- ClamAV- 0.102.4, 0.104.0, 0.104.1, 0.105.0, 1.0.0-rc, 1.2.0

Configuration files
TIP
The lines in the "scripts" below has been used for testing and successfully configure ClamAV (do not run the files as a executable script but line by line). You may use the testing guide to install ClamAV or follow our detailed step-by-step tutorial below.
- Ubuntu 22.04, ClamAV 1.2.0
- Ubuntu 22.04, ClamAV 1.0.0-rc
- Ubuntu 22.04, ClamAV 0.105.0
- Debian 11, ClamAV 0.104.1
- Rocky 8, ClamAV 0.104.1
Prerequisites
net-tools(optional)
Dependencies for Ubuntu 22.04
build-essential make pkg-config python3 python3-pip python3-pytest valgrind
check libbz2-dev libcurl4-openssl-dev libjson-c-dev libmilter-dev
libncurses5-dev libpcre2-dev libssl-dev libxml2-dev zlib1g-dev cmake rust-all cargo
Dependencies for Debian 11
gcc cmake make pkg-config python3 python3-pip python3-pytest valgrind
check libbz2-dev libcurl4-openssl-dev libmilter-dev libjson-c5 libjson-c-dev_0.15-2
libncurses5-dev libpcre2-dev libssl-dev libxml2-dev zlib1g-dev
Dependencies for Rocky 8
gcc gcc-c++ cmake make python3 python3-pip valgrind
bzip2-devel check-devel libcurl-devel libxml2-devel
ncurses-devel openssl-devel pcre2-devel sendmail-devel zlib-devel json-c-devel
Install ClamAV from source
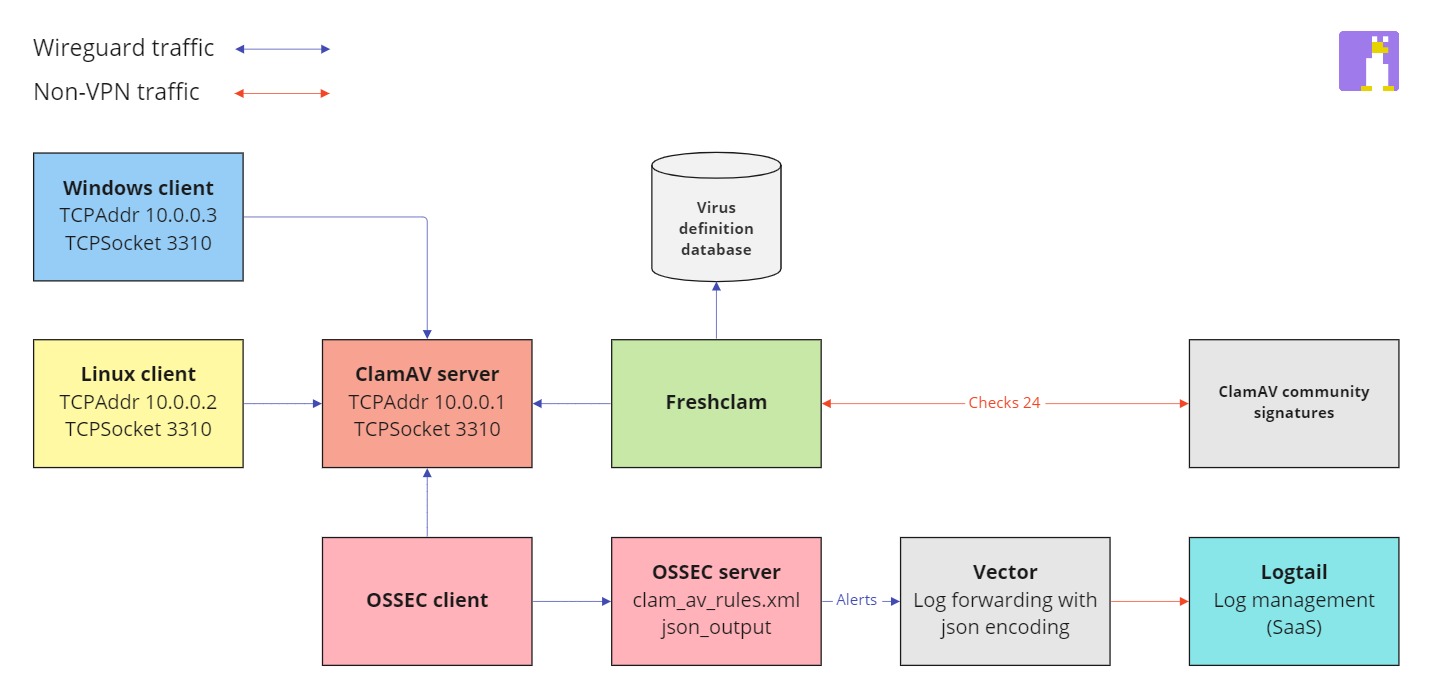
In this tutorial we'll install the ClamAV Antivirus Server (192.168.0.1) from source as a stand-alone server with Ubuntu 22.04, Debian 11 or Rocky 8. We'll be using the multiscan option so the more CPU threads the faster your scans will perform. The clients (192.168.0.2, 192.168.0.3) will not use the regular clamavscan but rather the clamdscan and listen to the ClamAV Antivirus Server's TCP socket instead of the local clients unix socket. This approach will also enable us to only keep the ClamAV defintion database up-to-date on the stand-alone server. The clients wont be built from source but rather use already available repository packages (Ubuntu 20.04 and Windows 10).
TIP
For Rocky 8 install Extra Packages for Enterprise Linux (EPEL) and enable PowerTools.
sudo yum -y install epel-release && \
sudo yum -y install dnf-plugins-core && \
sudo yum -y install https://dl.fedoraproject.org/pub/epel/epel-release-latest-8.noarch.rpm && \
sudo yum config-manager --set-enabled powertools
Once you've installed EPEL and enabled PowerTools (Rocky only) continue to install ClamAV dependencies.
INFO
Our ClamAV release candidate (1.0.0-rc) guide is only available for Ubuntu 22.04.
sudo apt-get update && \
sudo apt-get -y upgrade && \
sudo apt-get install -y build-essential && \
sudo apt-get install -y make pkg-config python3 python3-pip python3-pytest valgrind \
check libbz2-dev libcurl4-openssl-dev libjson-c-dev libmilter-dev \
libncurses5-dev libpcre2-dev libssl-dev libxml2-dev zlib1g-dev cmake rust-all cargo
sudo apt-get update && \
sudo apt-get -y upgrade && \
sudo apt-get install -y gcc cmake make pkg-config python3 python3-pip python3-pytest valgrind \
check libbz2-dev libcurl4-openssl-dev libmilter-dev \
libncurses5-dev libpcre2-dev libssl-dev libxml2-dev zlib1g-dev
sudo yum -y install gcc gcc-c++ cmake make python3 python3-pip valgrind \
bzip2-devel check-devel libcurl-devel libxml2-devel \
ncurses-devel openssl-devel pcre2-devel sendmail-devel zlib-devel json-c-devel
WARNING
Only install libjson-c5 and libjson-c-dev for Debian 11 when compiling ClamAV 0.104.1.
For ClamAV 0.104.1 and Debian 11 proceed to install packages libjson-c5 and libjson-c-dev.
wget http://ftp.se.debian.org/debian/pool/main/j/json-c/libjson-c5_0.15-2_amd64.deb && \
wget http://ftp.se.debian.org/debian/pool/main/j/json-c/libjson-c-dev_0.15-2_amd64.deb && \
sudo dpkg -i libjson-c5_0.15-2_amd64.deb && sudo dpkg -i libjson-c-dev_0.15-2_amd64.deb
Create ClamAV service group and user.
sudo groupadd clamav && sudo useradd -g clamav -s /bin/false -c "Clam Antivirus" clamav
sudo groupadd clamav && sudo useradd -g clamav -s /bin/false -c "Clam Antivirus" clamav
sudo groupadd clamav && sudo useradd -g clamav -s /bin/false -c "Clam Antivirus" clamav
sudo groupadd clamav && sudo useradd -g clamav -s /bin/false -c "Clam Antivirus" clamav
sudo groupadd clamav && sudo useradd -g clamav -s /bin/false -c "Clam Antivirus" clamav
Import ClamAV signing key
TIP
You can find the public ClamAV key here under Talos PGP Public Key.
Create a new .asc file, paste the public key and save.
touch clamav.asc && nano clamav.asc
touch clamav.asc && nano clamav.asc
touch clamav.asc && nano clamav.asc
touch clamav.asc && nano clamav.asc
touch clamav.asc && nano clamav.asc
Once you've saved the clamav.asc file proceed to import the key.
gpg --import clamav.asc
gpg --import clamav.asc
gpg --import clamav.asc
gpg --import clamav.asc
gpg --import clamav.asc
You should see that the public key Talos from Cisco Systems Inc. has been imported.
gpg: key 609B024F2B3EDD07: public key "Talos (Talos, Cisco Systems Inc.) <research@sourcefire.com>" imported
gpg: Total number processed: 1
gpg:               imported: 1
gpg: no ultimately trusted keys found
Now lets edit the key.
gpg --edit-key CCE0DFD21EC1A9BF
gpg --edit-key 609B024F2B3EDD07
gpg --edit-key 609B024F2B3EDD07
gpg --edit-key 609B024F2B3EDD07
When you get prompted type trust and select option 5 (I trust ultimately).
gpg (GnuPG) 2.2.19; Copyright (C) 2019 Free Software Foundation, Inc.
This is free software: you are free to change and redistribute it.
There is NO WARRANTY, to the extent permitted by law.

pub  rsa4096/609B024F2B3EDD07
     created: 2021-03-30  expires: 2023-03-30  usage: SC
     trust: unknown       validity: unknown
sub  rsa4096/73966F3B446077EC
     created: 2021-03-30  expires: 2023-03-30  usage: E
[ unknown] (1). Talos (Talos, Cisco Systems Inc.) <research@sourcefire.com>

gpg> trust
pub  rsa4096/609B024F2B3EDD07
     created: 2021-03-30  expires: 2023-03-30  usage: SC
     trust: unknown       validity: unknown
sub  rsa4096/73966F3B446077EC
     created: 2021-03-30  expires: 2023-03-30  usage: E
[ unknown] (1). Talos (Talos, Cisco Systems Inc.) <research@sourcefire.com>

Please decide how far you trust this user to correctly verify other users' keys
(by looking at passports, checking fingerprints from different sources, etc.)

  1 = I don't know or won't say
  2 = I do NOT trust
  3 = I trust marginally
  4 = I trust fully
  5 = I trust ultimately
  m = back to the main menu

Your decision? 5
Do you really want to set this key to ultimate trust? (y/N) y

pub  rsa4096/609B024F2B3EDD07
     created: 2021-03-30  expires: 2023-03-30  usage: SC
     trust: ultimate      validity: unknown
sub  rsa4096/73966F3B446077EC
     created: 2021-03-30  expires: 2023-03-30  usage: E
[ unknown] (1). Talos (Talos, Cisco Systems Inc.) <research@sourcefire.com>
Please note that the shown key validity is not necessarily correct
unless you restart the program.

gpg> quit
Build ClamAV server
Before you build ClamAV download both the source along with the signature to verify its validity.
wget https://www.clamav.net/downloads/production/clamav-1.2.0.tar.gz && \
wget https://www.clamav.net/downloads/production/clamav-1.2.0.tar.gz.sig && \
gpg --verify clamav-1.2.0.tar.gz.sig clamav-1.2.0.tar.gz
wget https://www.clamav.net/downloads/production/clamav-1.0.0-rc.tar.gz && \
wget https://www.clamav.net/downloads/production/clamav-1.0.0-rc.tar.gz.sig && \
gpg --verify clamav-1.0.0-rc.tar.gz.sig clamav-1.0.0-rc.tar.gz
wget https://www.clamav.net/downloads/production/clamav-0.105.0.tar.gz && \
wget https://www.clamav.net/downloads/production/clamav-0.105.0.tar.gz.sig && \
gpg --verify clamav-0.105.0.tar.gz.sig clamav-0.105.0.tar.gz
wget https://www.clamav.net/downloads/production/clamav-0.104.1.tar.gz && \
wget https://www.clamav.net/downloads/production/clamav-0.104.1.tar.gz.sig && \
gpg --verify clamav-0.104.1.tar.gz.sig clamav-0.104.1.tar.gz
wget https://www.clamav.net/downloads/production/clamav-0.104.1.tar.gz && \
wget https://www.clamav.net/downloads/production/clamav-0.104.1.tar.gz.sig && \
gpg --verify clamav-0.104.1.tar.gz.sig clamav-0.104.1.tar.gz
The output should say its a good signature from Cisco.
gpg: Signature made Wed 01 Sep 2021 05:52:12 PM UTC
gpg:                using RSA key 609B024F2B3EDD07
gpg: Good signature from "Talos (Talos, Cisco Systems Inc.) <research@sourcefire.com>" [ultimate]
Proceed to extract and build.
WARNING
This may take a while.
tar -xvzf clamav-1.2.0.tar.gz && \
cd clamav-1.2.0/ && \
mkdir -p build && cd build && \
cmake .. \
  -D CMAKE_INSTALL_PREFIX=/usr \
  -D CMAKE_INSTALL_LIBDIR=lib \
  -D APP_CONFIG_DIRECTORY=/etc/clamav \
  -D DATABASE_DIRECTORY=/var/lib/clamav \
  -D ENABLE_JSON_SHARED=OFF && \
cmake --build . && \
ctest
tar -xvzf clamav-1.0.0-rc.tar.gz && \
cd clamav-1.0.0-rc/ && \
mkdir -p build && cd build && \
cmake .. \
  -D CMAKE_INSTALL_PREFIX=/usr \
  -D CMAKE_INSTALL_LIBDIR=lib \
  -D APP_CONFIG_DIRECTORY=/etc/clamav \
  -D DATABASE_DIRECTORY=/var/lib/clamav \
  -D ENABLE_JSON_SHARED=OFF && \
cmake --build . && \
ctest
tar -xvzf clamav-0.105.0.tar.gz && \
cd clamav-0.105.0/ && \
mkdir -p build && cd build && \
cmake .. \
  -D CMAKE_INSTALL_PREFIX=/usr \
  -D CMAKE_INSTALL_LIBDIR=lib \
  -D APP_CONFIG_DIRECTORY=/etc/clamav \
  -D DATABASE_DIRECTORY=/var/lib/clamav \
  -D ENABLE_JSON_SHARED=OFF && \
cmake --build . && \
ctest
tar -xvzf clamav-0.104.1.tar.gz && \
cd clamav-0.104.1/ && \
mkdir -p build && cd build && \
cmake .. \
  -D CMAKE_INSTALL_PREFIX=/usr \
  -D CMAKE_INSTALL_LIBDIR=lib \
  -D APP_CONFIG_DIRECTORY=/etc/clamav \
  -D DATABASE_DIRECTORY=/var/lib/clamav \
  -D ENABLE_JSON_SHARED=ON && \
cmake --build . && \
ctest
The ctest should output the following information.
Test project ~/clamav-1.2.0/build
      Start  1: libclamav
 1/11 Test  #1: libclamav ........................   Passed   17.95 sec
      Start  2: libclamav_valgrind
 2/11 Test  #2: libclamav_valgrind ...............   Passed  159.68 sec
      Start  3: libclamav_rust
 3/11 Test  #3: libclamav_rust ...................   Passed   59.85 sec
      Start  4: clamscan
 4/11 Test  #4: clamscan .........................   Passed    9.90 sec
      Start  5: clamscan_valgrind
 5/11 Test  #5: clamscan_valgrind ................   Passed  272.86 sec
      Start  6: clamd
 6/11 Test  #6: clamd ............................   Passed   23.70 sec
      Start  7: clamd_valgrind
 7/11 Test  #7: clamd_valgrind ...................   Passed  113.01 sec
      Start  8: freshclam
 8/11 Test  #8: freshclam ........................   Passed   43.15 sec
      Start  9: freshclam_valgrind
 9/11 Test  #9: freshclam_valgrind ...............   Passed   80.14 sec
      Start 10: sigtool
10/11 Test #10: sigtool ..........................   Passed    1.32 sec
      Start 11: sigtool_valgrind
11/11 Test #11: sigtool_valgrind .................   Passed   24.31 sec

100% tests passed, 0 tests failed out of 11

Total Test time (real) = 805.88 sec
Test project ~/clamav-1.0.0-rc/build
      Start  1: libclamav
 1/11 Test  #1: libclamav ........................   Passed   17.88 sec
      Start  2: libclamav_valgrind
 2/11 Test  #2: libclamav_valgrind ...............   Passed  162.41 sec
      Start  3: libclamav_rust
 3/11 Test  #3: libclamav_rust ...................   Passed   52.26 sec
      Start  4: clamscan
 4/11 Test  #4: clamscan .........................   Passed    9.07 sec
      Start  5: clamscan_valgrind
 5/11 Test  #5: clamscan_valgrind ................   Passed  264.67 sec
      Start  6: clamd
 6/11 Test  #6: clamd ............................   Passed   21.70 sec
      Start  7: clamd_valgrind
 7/11 Test  #7: clamd_valgrind ...................   Passed   88.80 sec
      Start  8: freshclam
 8/11 Test  #8: freshclam ........................   Passed    2.64 sec
      Start  9: freshclam_valgrind
 9/11 Test  #9: freshclam_valgrind ...............   Passed   66.21 sec
      Start 10: sigtool
10/11 Test #10: sigtool ..........................   Passed    1.18 sec
      Start 11: sigtool_valgrind
11/11 Test #11: sigtool_valgrind .................   Passed    3.60 sec

100% tests passed, 0 tests failed out of 11

Total Test time (real) = 690.45 sec
Test project ~/clamav-0.105.0/build
      Start  1: libclamav
 1/11 Test  #1: libclamav ........................   Passed   19.97 sec
      Start  2: libclamav_valgrind
 2/11 Test  #2: libclamav_valgrind ...............   Passed  255.57 sec
      Start  3: libclamav_rust
 3/11 Test  #3: libclamav_rust ...................   Passed  787.73 sec
      Start  4: clamscan
 4/11 Test  #4: clamscan .........................   Passed    6.44 sec
      Start  5: clamscan_valgrind
 5/11 Test  #5: clamscan_valgrind ................   Passed  151.66 sec
      Start  6: clamd
 6/11 Test  #6: clamd ............................   Passed   21.74 sec
      Start  7: clamd_valgrind
 7/11 Test  #7: clamd_valgrind ...................   Passed  103.19 sec
      Start  8: freshclam
 8/11 Test  #8: freshclam ........................   Passed    2.93 sec
      Start  9: freshclam_valgrind
 9/11 Test  #9: freshclam_valgrind ...............   Passed   70.33 sec
      Start 10: sigtool
10/11 Test #10: sigtool ..........................   Passed    1.25 sec
      Start 11: sigtool_valgrind
11/11 Test #11: sigtool_valgrind .................   Passed    3.81 sec

100% tests passed, 0 tests failed out of 11

Total Test time (real) = 1424.64 sec
Test project ~/clamav-0.104.1/build
      Start  1: libclamav
 1/10 Test  #1: libclamav ........................   Passed   14.78 sec
      Start  2: libclamav_valgrind
 2/10 Test  #2: libclamav_valgrind ...............   Passed  138.25 sec
      Start  3: clamscan
 3/10 Test  #3: clamscan .........................   Passed    4.21 sec
      Start  4: clamscan_valgrind
 4/10 Test  #4: clamscan_valgrind ................   Passed   63.91 sec
      Start  5: clamd
 5/10 Test  #5: clamd ............................   Passed   15.90 sec
      Start  6: clamd_valgrind
 6/10 Test  #6: clamd_valgrind ...................   Passed   63.48 sec
      Start  7: freshclam
 7/10 Test  #7: freshclam ........................   Passed    6.80 sec
      Start  8: freshclam_valgrind
 8/10 Test  #8: freshclam_valgrind ...............   Passed   37.96 sec
      Start  9: sigtool
 9/10 Test  #9: sigtool ..........................   Passed    0.30 sec
      Start 10: sigtool_valgrind
10/10 Test #10: sigtool_valgrind .................   Passed    1.42 sec

100% tests passed, 0 tests failed out of 10

Total Test time (real) = 347.01 sec
Once the test successfully passed proceed to build and install ClamAV.
sudo cmake --build . --target install
sudo cmake --build . --target install
sudo cmake --build . --target install
sudo cmake --build . --target install
sudo cmake --build . --target install
Server configuration
When the installation is complete there's example configuration files created by default e.g. /etc/clamav/clamd.conf.sample. You may read through the sample configuration files to get a better understanding on which options you prefer to enable. Otherwise feel free to use the beneath options and creation of the ClamAV daemon configuration file.
sudo bash -c 'cat << EOF > /etc/clamav/clamd.conf
LocalSocket /var/run/clamav/clamd.socket
FixStaleSocket true
LocalSocketGroup clamav
LocalSocketMode 666
User clamav
TCPSocket 3310
ScanMail true
ScanArchive true
ArchiveBlockEncrypted false
MaxDirectoryRecursion 15
FollowDirectorySymlinks false
FollowFileSymlinks false
ReadTimeout 180
MaxThreads 12
MaxConnectionQueueLength 15
LogSyslog false
LogRotate true
LogFacility LOG_LOCAL6
LogClean false
LogVerbose false
PreludeEnable no
PreludeAnalyzerName ClamAV
DatabaseDirectory /var/lib/clamav
OfficialDatabaseOnly false
SelfCheck 3600
Foreground false
Debug false
ScanPE true
MaxEmbeddedPE 10M
ScanOLE2 true
ScanPDF true
ScanHTML true
MaxHTMLNormalize 10M
MaxHTMLNoTags 2M
MaxScriptNormalize 5M
MaxZipTypeRcg 1M
ScanSWF true
ExitOnOOM false
LeaveTemporaryFiles false
AlgorithmicDetection true
ScanELF true
IdleTimeout 30
CrossFilesystems true
PhishingSignatures true
PhishingScanURLs true
PhishingAlwaysBlockSSLMismatch false
PhishingAlwaysBlockCloak false
PartitionIntersection false
DetectPUA false
ScanPartialMessages false
HeuristicScanPrecedence false
StructuredDataDetection false
CommandReadTimeout 30
SendBufTimeout 200
MaxQueue 100
ExtendedDetectionInfo true
OLE2BlockMacros false
AllowAllMatchScan true
ForceToDisk false
DisableCertCheck false
DisableCache false
MaxScanTime 120000
MaxScanSize 100M
MaxFileSize 25M
MaxRecursion 16
MaxFiles 10000
MaxPartitions 50
MaxIconsPE 100
PCREMatchLimit 10000
PCRERecMatchLimit 5000
PCREMaxFileSize 25M
ScanXMLDOCS true
ScanHWP3 true
MaxRecHWP3 16
StreamMaxLength 25M
LogFile /var/log/clamav/clamav.log
LogTime true
LogFileUnlock false
LogFileMaxSize 0
Bytecode true
BytecodeSecurity TrustSigned
BytecodeTimeout 60000
OnAccessMaxFileSize 5M
EOF'
Same with ClamAV freshclam there's a sample configuration file created at /etc/clamav/freshclam.conf.sample. You may also use the following configuration file for freshclam to keep your signature database up-to-date.
sudo bash -c 'cat << EOF > /etc/clamav/freshclam.conf
DatabaseOwner clamav
UpdateLogFile /var/log/clamav/freshclam.log
LogVerbose false
LogSyslog false
LogFacility LOG_LOCAL6
LogFileMaxSize 0
LogRotate true
LogTime true
Foreground false
Debug false
MaxAttempts 5
DatabaseDirectory /var/lib/clamav
DNSDatabaseInfo current.cvd.clamav.net
ConnectTimeout 30
ReceiveTimeout 0
TestDatabases yes
ScriptedUpdates yes
CompressLocalDatabase no
Bytecode true
NotifyClamd /etc/clamav/clamd.conf
Checks 24
DatabaseMirror db.local.clamav.net
DatabaseMirror database.clamav.net
EOF'
Before we'll create the system files for both the ClamAV daemon and freshclam create the required directories and adjust the owner permissions.
sudo mkdir /var/log/clamav/ /var/lib/clamav /var/run/clamav/ && \
sudo chown clamav:clamav /var/log/clamav/ /var/lib/clamav /var/run/clamav/
sudo mkdir /var/log/clamav/ /var/lib/clamav /var/run/clamav/ && \
sudo chown clamav:clamav /var/log/clamav/ /var/lib/clamav /var/run/clamav/
sudo mkdir /var/log/clamav/ /var/lib/clamav /var/run/clamav/ && \
sudo chown clamav:clamav /var/log/clamav/ /var/lib/clamav /var/run/clamav/
sudo mkdir /var/log/clamav/ /var/lib/clamav /var/run/clamav/ && \
sudo chown clamav:clamav /var/log/clamav/ /var/lib/clamav /var/run/clamav/
Next create the service file for freshclam.
sudo bash -c 'cat << EOF > /etc/systemd/system/clamav-freshclam.service
[Unit]
Description=ClamAV virus database updater
Documentation=man:freshclam(1) man:freshclam.conf(5) https://www.clamav.net/documents
# If user wants it run from cron, dont start the daemon.
ConditionPathExists=!/etc/cron.d/clamav-freshclam
Wants=network-online.target
After=network-online.target

[Service]
User=clamav
Group=clamav
ExecStart=/usr/bin/freshclam -d --foreground=true
StandardOutput=syslog

[Install]
WantedBy=multi-user.target
EOF'
Proceed to create the ClamAV daemon service file.
sudo bash -c 'cat << EOF > /etc/systemd/system/clamav-daemon.service
[Unit]
Description=Clam AntiVirus userspace daemon
Documentation=man:clamd(8) man:clamd.conf(5) https://www.clamav.net/documents/
# Check for database existence
ConditionPathExistsGlob=/var/lib/clamav/main.{c[vl]d,inc}
ConditionPathExistsGlob=/var/lib/clamav/daily.{c[vl]d,inc}

[Service]
User=clamav
Group=clamav
ExecStart=/usr/sbin/clamd --foreground=true
# Reload the database
ExecReload=/bin/kill -USR2 $MAINPID
StandardOutput=syslog
TimeoutStartSec=420

[Install]
WantedBy=multi-user.target
EOF'
To enable the created startup scripts, reload the system control daemon.
sudo systemctl daemon-reload
sudo systemctl daemon-reload
sudo systemctl daemon-reload
sudo systemctl daemon-reload
Once you've reloaded the daemon proceed to enable each of the services.
sudo systemctl enable clamav-freshclam.service
sudo systemctl enable clamav-daemon.service
sudo systemctl enable clamav-freshclam.service
sudo systemctl enable clamav-daemon.service
sudo systemctl enable clamav-freshclam.service
sudo systemctl enable clamav-daemon.service
sudo systemctl enable clamav-freshclam.service
sudo systemctl enable clamav-daemon.service
Next start each service.
TIP
If the ClamAV daemon wont start just restart the service once freshclam downloaded the latest virus definitions.
sudo systemctl start clamav-freshclam.service
sudo systemctl start clamav-daemon.service
sudo systemctl start clamav-freshclam.service
sudo systemctl start clamav-daemon.service
sudo systemctl start clamav-freshclam.service
sudo systemctl start clamav-daemon.service
sudo systemctl start clamav-freshclam.service
sudo systemctl start clamav-daemon.service
To check that your ClamAV daemon is listening to both the local unix socket and the TCP port 3310 run the following command.
netstat -lnp | grep -E "(clam|3310)"
(Not all processes could be identified, non-owned process info
 will not be shown, you would have to be root to see it all.)
tcp        0      0 0.0.0.0:3310            0.0.0.0:*               LISTEN      -
tcp6       0      0 :::3310                 :::*                    LISTEN      -
unix  2      [ ACC ]     STREAM     LISTENING     73674    -                    /var/run/clamav/clamd.socket
netstat -lnp | grep -E "(clam|3310)"
(Not all processes could be identified, non-owned process info
 will not be shown, you would have to be root to see it all.)
tcp        0      0 0.0.0.0:3310            0.0.0.0:*               LISTEN      -
tcp6       0      0 :::3310                 :::*                    LISTEN      -
unix  2      [ ACC ]     STREAM     LISTENING     320610   -                    /var/run/clamav/clamd.socket
Install from repository
You may also install ClamAV Antivirus Server directly from the repository. Download the ClamAV scanner and the ClamAV daemon.
server@ubuntu:~$ sudo apt-get install clamav clamav-daemon
Proceed to stop freshclam the automatic database update tool for ClamAV.
server@ubuntu:~$ sudo systemctl stop clamav-freshclam
Next run freshclam to update to the latest definition database.
server@ubuntu:~$ sudo freshclam
Once you've ran the freshclam command you can check the log /var/log/clamav/freshclam.log for the current status and then start freshclam again.
server@ubuntu:~$ cat /var/log/clamav/freshclam.log
Sat Apr 10 17:51:37 2021 -> daily.cvd database is up to date (version: 26136, sigs: 3969743, f-level: 63, builder: raynman)
Sat Apr 10 17:51:37 2021 -> main.cvd database is up to date (version: 59, sigs: 4564902, f-level: 60, builder: sigmgr)
Sat Apr 10 17:51:37 2021 -> bytecode.cvd database is up to date (version: 333, sigs: 92, f-level: 63, builder: awillia2)
server@ubuntu:~$ sudo systemctl start clamav-freshclam
Now we'll update the ClamAV daemon configuration to make the server listen to TCP socket 3310.
server@ubuntu:~$ sudo nano /etc/clamav/clamd.conf
WARNING
You will need to comment out the line "Example" in the clamd.conf configuration file, else the ClamAV daemon will consider the configuration invalid.
#Automatically Generated by clamav-daemon postinst
#To reconfigure clamd run #dpkg-reconfigure clamav-daemon
#Please read /usr/share/doc/clamav-daemon/README.Debian.gz for details
LocalSocket /var/run/clamav/clamd.socket
FixStaleSocket yes
LocalSocketGroup clamav
LocalSocketMode 666
# TemporaryDirectory is not set to its default /tmp here to make overriding
# the default with environment variables TMPDIR/TMP/TEMP possible
User clamav
TCPSocket 3310
Restart ClamAV to apply the new changes.
server@ubuntu:~$ sudo systemctl restart clamav-daemon.service
To confirm that ClamAV listen to TCP port 3310 run the command below (requires net-tools).
server@ubuntu:~$ netstat -lnp | grep -E "(clam|3310)"
(Not all processes could be identified, non-owned process info
 will not be shown, you would have to be root to see it all.)
tcp        0      0 0.0.0.0:3310            0.0.0.0:*               LISTEN      -
tcp6       0      0 :::3310                 :::*                    LISTEN      -
unix  2      [ ACC ]     STREAM     LISTENING     73674    -                    /var/run/clamav/clamd.ctl
Make sure that the firewall settings are in place and that the correct ports are opened for any ClamAV client. See the Firewall settings section for more information.
Keep virus definitions up-to-date
To keep the ClamAV Antivirus Server definition database up-to-date you can configure freshclam when to check for new definitions. The default is set to 24 times per day. If you want to edit this you can define the times per day for freshclam to check for new updates.
server@ubuntu:~$ sudo nano /etc/clamav/freshclam.conf
# Check for new database 24 times a day
Checks 24
You can use the clamdtop command-line tool when you've installed ClamAV on your clients. This tool enables you to monitor the ClamAV daemon performance and client connections during scan.
server@ubuntu:~$ clamdtop

  _____/ /___ _____ ___  ____/ / /_____  ____
 / ___/ / __ `/ __ `__ \/ __  / __/ __ \/ __ \
/ /__/ / /_/ / / / / / / /_/ / /_/ /_/ / /_/ /
\___/_/\__,_/_/ /_/ /_/\__,_/\__/\____/ .___/
                                     /_/
Connecting to: /var/run/clamav/clamd.ctl
Linux client
Install ClamAV on Ubuntu 20.04.
client@ubuntu:~$ sudo apt-get install clamav clamav-daemon
Next stop and disable the ClamAV daemon (as we will forward the traffic to the ClamAV server). The virus definitions database is managed on the server so you need to stop and disable the freshclam service as well.
client@ubuntu:~$ sudo systemctl stop clamav-daemon.service
client@ubuntu:~$ sudo systemctl stop clamav-freshclam.service
client@ubuntu:~$ sudo systemctl disable clamav-daemon.service
client@ubuntu:~$ sudo systemctl disable clamav-freshclam.service
Continue to configure the clamdscan which share configuration file with the ClamAV daemon.
client@ubuntu:~$ sudo nano /etc/clamav/clamd.conf
Comment the LocalSocket /var/run/clamav/clamd.ctl line and add the TCPSocket 3310 along with the server TCPAddr.
#Automatically Generated by clamav-daemon postinst
#To reconfigure clamd run #dpkg-reconfigure clamav-daemon
#Please read /usr/share/doc/clamav-daemon/README.Debian.gz for details
#LocalSocket /var/run/clamav/clamd.ctl
FixStaleSocket true
LocalSocketGroup clamav
LocalSocketMode 666
# TemporaryDirectory is not set to its default /tmp here to make overriding
# the default with environment variables TMPDIR/TMP/TEMP possible
User clamav
TCPSocket 3310
TCPAddr 192.168.0.1
When running a scan use the multiscan option to enable multihread reading. You can also set it to quiet if you're going to use the log option. You can also create a file list for all the directories to scan.
client@ubuntu:~$ sudo clamdscan --multiscan --quiet --file-list= --log=
Windows client
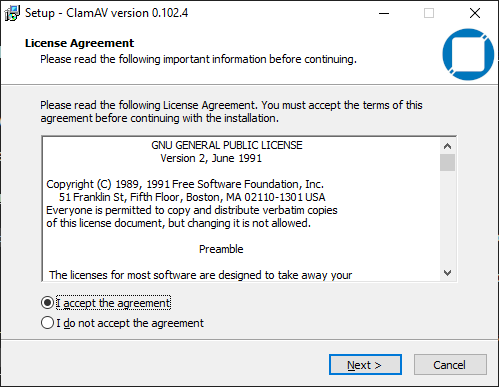
First download the ClamAV Windows Installer (version 0.102.4). Right-click the executable file ClamAV-0.102.4.exe and select Run as Administrator.
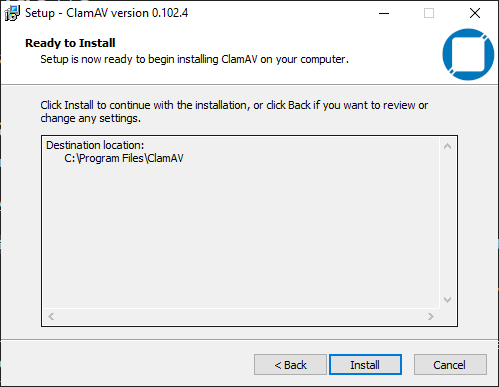
Select destination location.

Proceed to click the Install button.
Once the installation is complete click the Finish button.
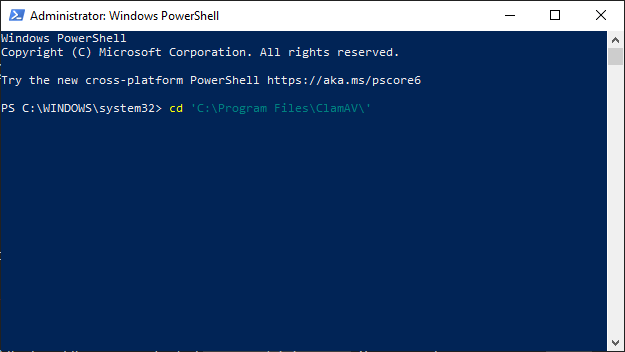
Run PowerShell as administrator and make sure you're in the correct path C:\WINDOWS\system32. Navigate to the ClamAV directory by entering cd 'C:\Program Files\ClamAV\.
Now copy the ClamAV daeomon configuration and rename it to clamd.conf and open the file in WordPad.
client@windows:~PS$ copy .\conf_examples\clamd.conf.sample .\clamd.conf
client@windows:~PS$ write.exe .\clamd.conf

Comment the Example line and add the TCPSocket along with the server TCPAddr and save.
##
## Example config file for the Clam AV daemon
## Please read the clamd.conf(5) manual before editing this file.
##

# Comment or remove the line below.
#Example

# The daemon on Windows only supports unsecured TCP sockets.
# Due to security reasons make sure that your IP & port is not
# exposed to the open internet.

# TCP port address.
# Default: no
TCPSocket 3310

# TCP address.
# By default we bind to INADDR_ANY, probably not wise.
# Enable the following to provide some degree of protection
# from the outside world. This option can be specified multiple
# times if you want to listen on multiple IPs. IPv6 is now supported.
# Default: no
TCPAddr 192.168.0.1
You may fast test the configuration running a scan in the current directory.

Running a more complete scan, like during the Ubuntu set up, use the multiscan option to enable multithread reading. Set the output to quiet in case you will use the log option. As priorly mentioned you may also define a file list of all the directories you wish to include in the scan.
client@windows:~PS$ .\clamdscan.exe --multiscan --quiet --file-list= --log=
Firewall settings
The firewall being used is UFW (Uncomplicated Firewall). It is set by default to deny incoming traffic, allow outgoing traffic and allow port 22 (OpenSSH). Read more about UFW here.
UFW Settings
server@ubuntu:~$ sudo ufw default deny incoming
server@ubuntu:~$ sudo ufw default allow outgoing
server@ubuntu:~$ sudo ufw allow 22
server@ubuntu:~$ sudo ufw enable
Command may disrupt existing ssh connections. Proceed with operation (y|n)? y
Firewall is active and enabled on system startup
server@ubuntu:~$ sudo ufw allow proto tcp from 192.168.0.2 to any port 3310 comment "ClamAV client 1"
server@ubuntu:~$ sudo ufw allow proto tcp from 192.168.0.3 to any port 3310 comment "ClamAV client 2"
If you want to allow TCP connection to port 3310 for the entire subnet apply the following UFW rule.
server@ubuntu:~$ sudo ufw allow proto tcp from 192.168.0.0/24 to any port 3310 comment "ClamAV clients"
Troubleshooting
In case you'll need help troubleshooting or support for ClamAV you can sign up for their mailing list at ClamAV users.
Enterprise solutions non-sponsored
Atomic Protector
Atomic Protector, is an upgrade from Atomic Secured Linux and Atomic Workload Protection products, provides maximum security and compliance for systems in on-premise, cloud and hybrid environments all in a single pane of glass you can run anywhere. Features include compliance and vulnerability management, reporting, intrusion prevention, file integrity monitoring, memory protection and exploit prevention, vulnerability shielding, web application and API protection, application control, and more.